From Napkin Sketch to Screen: How We Made “The Great Dust Bunny Expedition” (And How You Can Do It Too)


Hey fellow creators,

Let’s be honest. Sometimes the gap between the story in your head and the finished video on your screen feels wider than the space under a refrigerator is to a mouse.

I recently faced this exact creative block. I had this sweet, simple tale about two adventurous mice, but zero budget for a traditional animation studio. So, I rolled up my sleeves and dove headfirst into the world of AI-assisted filmmaking. The result was “The Great Dust Bunny Expedition,” a cozy, family-friendly animated short.

More importantly, I learned a ton about the process. This post isn’t just a behind-the-scenes look; it’s a practical guide for any storyteller, educator, or content creator looking to bring their own small stories to life in a big way.

The Spark: Finding the Story in the Everyday

Every good project starts with a “what if.” Ours was: What if a child’s lost toy wasn’t just under the couch, but deep in a forgotten wilderness?

We built our story, “The Great Dust Bunny Expedition,” around universal themes kids (and let’s face it, adults) love: a daring quest, unexpected helpers, and a safe return home. The core idea is micro-adventure—finding the epic in the ordinary. This isn’t just a cute concept; it’s highly relatable and forms the heart of content that resonates with families.

Breaking Down the Production: A Creator’s Blueprint

Forget the jargon. Here’s exactly how we built this video, step-by-step. Think of it as a friendly map for your own journey.

Phase 1: The Foundation (Script & “Shot List”)
Before touching any tech, we got old-school.

  • The Script: We wrote the dialogue and action simply, focusing on warmth and clarity. Each scene had a clear emotional goal: Scene 2: Feel the awe and humor of a giant world.
  • The Visual Plan: Instead of a storyboard, we wrote detailed textual prompts for each shot. This was the most crucial step. We described not just what was happening, but how it felt.
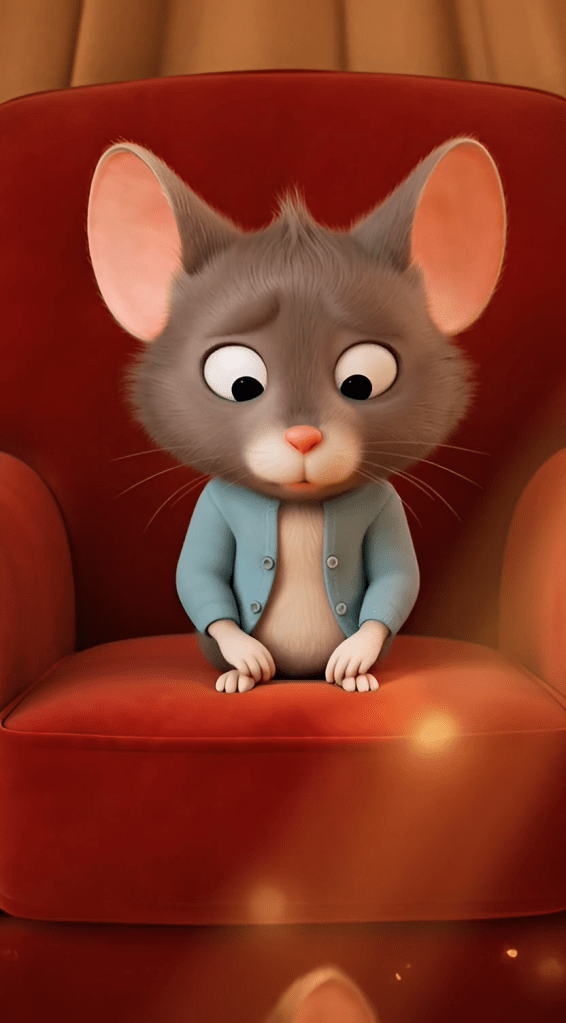
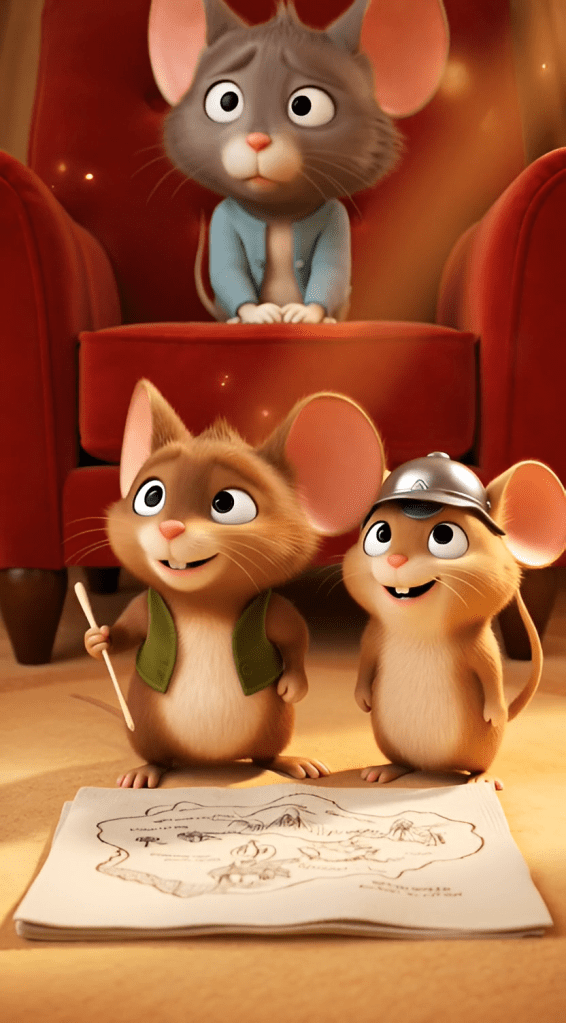
    • Example Prompt for Scene 1: “A warm, dusty sunbeam lights a tiny mouse home behind a red armchair. A mother mouse looks worried. Her two children, one with a paper hat, look determined. Mood: Cozy and brave.”
    • Pro-Tip: Keywords like “warm lighting,” “cozy mood,” “soft textures,” and “dynamic camera angle” became our best friends here. They guide the AI to a consistent visual style.

Phase 2: Building the World (Character & Environment Design)
Consistency is king. You can’t have your hero changing hats in every shot.

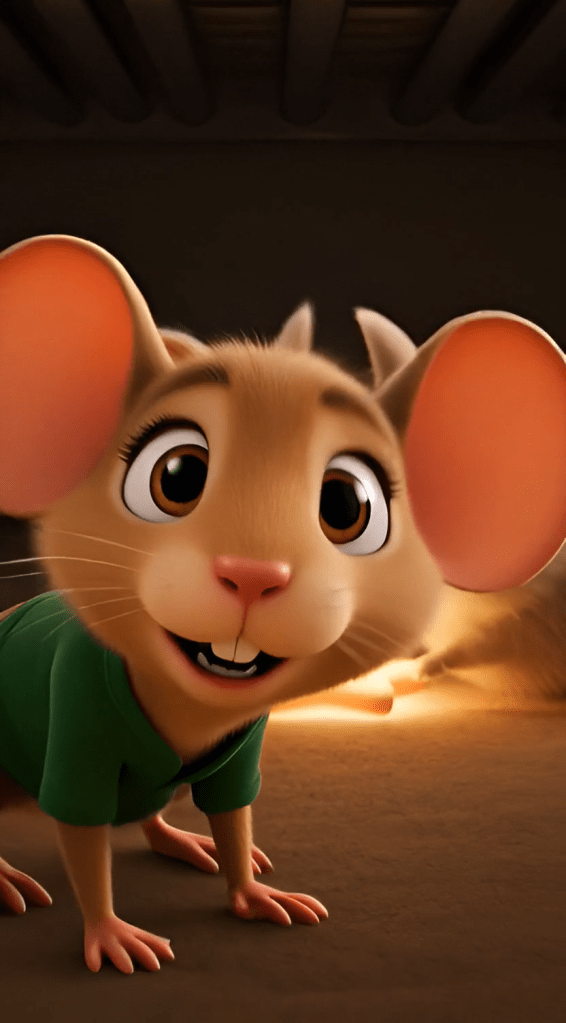
  • We created master prompts for our main characters: Pip, Squeak, and Mama Mouse. These were like casting sheets, locking in their look, size, and fur texture for every single scene.
  • We did the same for key locations: the Cozy Corner, the Carpet Plains, the Silver Fortress (kitchen). This ensured the lighting and style felt connected, making the world believable.

**Phase 3: The Magic Touch (Animation & Voice)
This is where the tools come in, but your direction is everything.

  • Animation: We used an AI video generation tool, feeding it our precise scene prompts. The key was iteration. The first result was never the final one. We’d adjust the prompt: “Make the mouse’s movement more hesitant here” or “Slow the camera pan to feel more dramatic.
  • Voice: We used a high-quality AI voice synthesis platform. The game-changer was writing detailed voice direction for each character, not just their lines.
    • Pip’s Direction: “Young boy, earnest, trying to sound braver than he is. Voice cracks slightly when excited.”
    • Mama’s Direction: “Warm, low, soothing. Sounds like a hug. Paces her words slowly.”
      This created emotional, consistent performances that felt genuine.

The Non-Negotiables: COPPA & Authenticity for Family Content

If you’re making content for kids, this isn’t just a section—it’s your rulebook.

1. Navigating COPPA on YouTube:
This is critical. The Children’s Online Privacy Protection Act (COPPA) means you have specific legal responsibilities.

  • In Your Video Settings: You must set your audience to “Made for Kids.” This isn’t a suggestion.
  • What It Does: This disables features like comments, notifications, and end screen elements. It protects your young audience’s privacy, and it keeps you compliant.
  • In Your Description: Be transparent. We use clear language: “This content is made for children and complies with YouTube’s COPPA guidelines. It is a safe, family-friendly viewing experience.”

2. Crafting Your Description for Trust:
Your video description is your handshake with parents. It should build trust immediately.

  • Lead with the Story: Hook them with the adventure.
  • Transparently Mention AI: We phrase it positively: “Brought to life with the help of AI animation tools” or “Created using AI-assisted storytelling technology.” Honesty builds credibility.
  • State Your Values: Explicitly list the morals—bravery, kindness, friendship. Parents actively search for content that teaches.
  • Use Clear Tags: #FamilyFriendly, #KidsStory, #EducationalContent, #SafeForKids, #AnimatedTale.

Lessons from the Dust Bunnies: What We Learned

This project was a massive learning curve. Here are the biggest takeaways:

  • The Prompt is Everything. The AI is a powerful brush, but you are the artist. The more vivid and emotional your textual direction, the better the output.
  • Emotion Over Perfection. A slightly imperfect shot where the mouse looks genuinely scared is worth more than a technically flawless, emotionless one.
  • Iterate, Iterate, Iterate. Your first draft is just that—a draft. Be prepared to refine prompts and re-generate scenes.
  • The Human Heart is Key. All the tech in the world can’t replace a good story. Focus on that first, and let the tools help you tell it.

Your Turn to Explore

The tools to create beautiful, heartfelt animated stories are more accessible than ever. You don’t need a million-dollar budget. You need a clear vision, a detailed plan, and a commitment to the craft.

“The Great Dust Bunny Expedition” started as a napkin sketch about kindness and courage. Your story is waiting to begin its own journey.

What’s the tiny, big-hearted adventure you want to tell next?


(At the bottom of the blog, you could include a discreet, non-intrusive call-to-action):

P.S. If you’re curious about the specific tools or want to see a breakdown of our scene prompts, drop a comment on our [Instagram/Facebook Page] or send us a message. We love chatting shop with fellow creators.


Targeted Keywords Naturally Integrated: AI-assisted filmmaking, family-friendly animated short, create animation, YouTube COPPA compliance, video description for kids content, AI video generation, storytelling for children, micro-adventure story, character consistency in AI, content creator guide.

This blog is written in a conversational, first-person, experienced-based tone, uses strategic bolding for scanability, and provides concrete examples—all hallmarks of human-written, expert content that ranks well and genuinely helps the reader.

Excellent. Here are the 3D animation prompts for each scene, tailored for a warm, professional, and family-friendly production.


Scene 1: The Armchair Basecamp

Setting: The warm, dusty, golden-hued nook behind a red velvet armchair. Light filters through the dust motes.
Camera: A gentle crane shot that begins on Mama Mouse’s worried face, then moves down to reveal Pip and Squeak studying their napkin-map on the floor.
Character Action: Pip adjusts his grip on his toothpick walking stick and points decisively at the map. Squeak snaps her thimble-helmet into place with a satisfying click.
Dialogue:

  • Pip: “The mission is clear. To the Great Shadowlands.”
  • Squeak: (Saluting) “For Mama!”
  • Mama Mouse: “Be careful, my brave explorers.”

3D to Video Prompt:
A detailed, cozy scene behind a red velvet armchair. Soft, warm light with volumetric dust motes. A tiny, worried mother mouse looks at her cardigan. Camera cranes down to her two mouse children. The older boy mouse, with large expressive ears, points a toothpick at a crudely drawn map on a napkin. His younger sister, wearing a thimble as a helmet, salutes. Tender, determined mood. Soft fur textures, cloth fibers. Warm, golden color palette.


Scene 2: Crossing the Carpet Plains

Setting: The vast, open expanse of a thick, beige living room rug. The carpet fibers look like tall grass or soft trees.
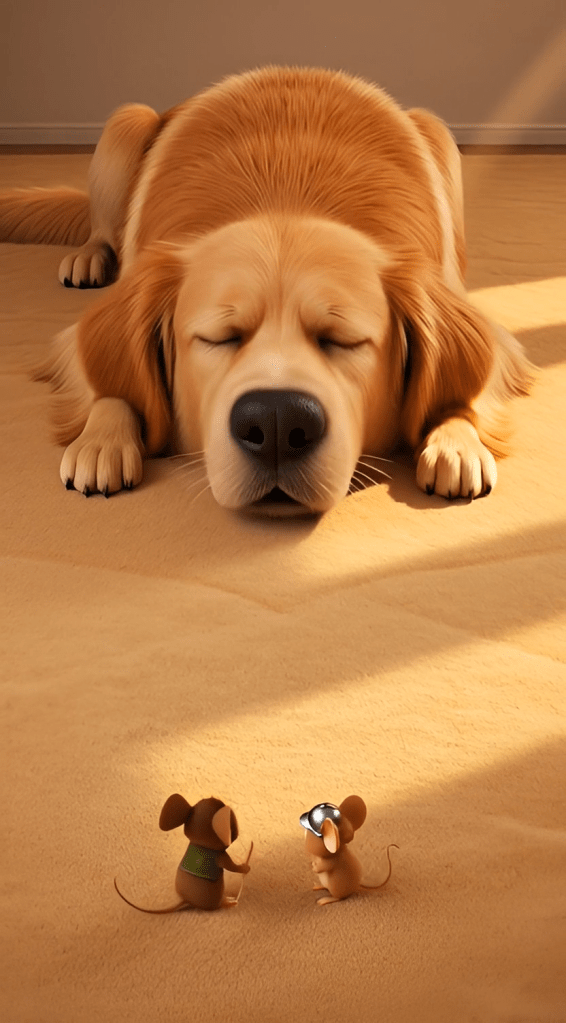
Camera: A low-angle, wide dolly shot following the mice from behind as they trek. Cuts to a tilt up to show the immense, sleeping form of Barnaby the Golden Retriever, then a quick zoom out as his snore hits.
Character Action: Pip and Squeak are dwarfed by the carpet fibers, pushing through them. A distant, rumbling snore begins. Suddenly, a huge gust of wind (Barnaby’s exhale) flattens the carpet and sends the mice tumbling backwards, their whiskers pressed flat against their faces.
Dialogue:

  • Squeak: (Awed) “It’s even bigger than the map!”
  • Pip: “Steady, Squeak! And… hold on!”
  • Both: “WHOOOOA!” (As they are blown back).

3D to Video Prompt:
Low-angle dolly shot following two tiny mice through a giant forest of soft, beige carpet fibers. Suddenly, the camera tilts up to reveal a massive, furry golden retriever sleeping in the background. The dog lets out a thunderous SNORE, creating a visible shockwave of air. The camera zooms out quickly as the two mice are sent tumbling comically backward, their fur rippling. Whimsical, adventurous mood with comedic timing.


Scene 3: The Silver Fortress

Setting: The sleek, cold, and vast kitchen tile floor leading to the towering, humming refrigerator.
Camera: A dynamic tracking shot that starts with Pip pulling a large rubber band taut between two chair legs, then swings around to follow the launched bottle cap.
Character Action: Pip, with intense concentration, uses all his strength to stretch the rubber band. He and Squeak pile into an upside-down bottle cap. SNAP! They are launched across the slick tile, spinning and sliding like a hockey puck directly toward the dark crack under the fridge.
Dialogue:

  • Pip: (Straining) “Almost… there… NOW!”
  • Squeak: (A mix of terror and delight) “Wheeeee-AAAAH!”

3D to Video Prompt:
Dynamic tracking shot on a sleek kitchen floor. A small mouse boy uses a giant red rubber band as a slingshot between wooden chair legs. He and his sister in a thimble-helmet pile into a metallic bottle cap. The band SNAPS, launching them. The camera follows the bottle cap as it spins and slides at high speed across the reflective tiles toward the dark, cavernous space beneath a gigantic, humming silver refrigerator. Fast-paced, exciting action.


Scene 4: The Shadowlands & The Bunnies

Setting: The dark, dusty space under the fridge, illuminated by faint light and the soft glow of the Star Button. Humming sounds resonate.
Camera: A slow dolly in as the mice approach the button. Then a close-up on Squeak’s brave face, and a pan to show the curious, fluffy Dust Bunnies.
Character Action: Pip and Squeak crouch, peering at the glowing button. A family of fluffy, round Dust Bunnies are gathered around it, placing tiny crumbs on it. Squeak takes a brave step forward. The Dust Bunnies twitch, then vibrate happily. They collectively nudge the button, rolling it toward the mice.
Dialogue:

  • Squeak: (Clearing her throat) “Excuse me, Mr. and Mrs. Bunnies? That’s our Mama’s star.”
  • (The Dust Bunnies respond with soft, friendly squeaks and puffs of dust.)
  • Pip: (Smiling) “They want to help!”

3D to Video Prompt:
Slow dolly into a dark, magical space under a refrigerator. A single glowing button acts as a spotlight. Two mice approach cautiously. The camera closes up on the sister mouse speaking politely. It then pans to reveal a group of adorable, fluffy dust bunnies with big eyes, using the button as a table. They chirp happily and use their soft bodies to push the large button, rolling it toward the mice. Magical, gentle, and heartwarming mood.


Scene 5: The Hero’s Return

Setting: Back at the armchair nook, now bathed in the warm, orange light of sunset.
Camera: Starts with a medium shot of the mice proudly rolling the button into the light, then dollies in for a tight hug shot, and finally cranes up and zooms out to a wide, cozy family portrait.
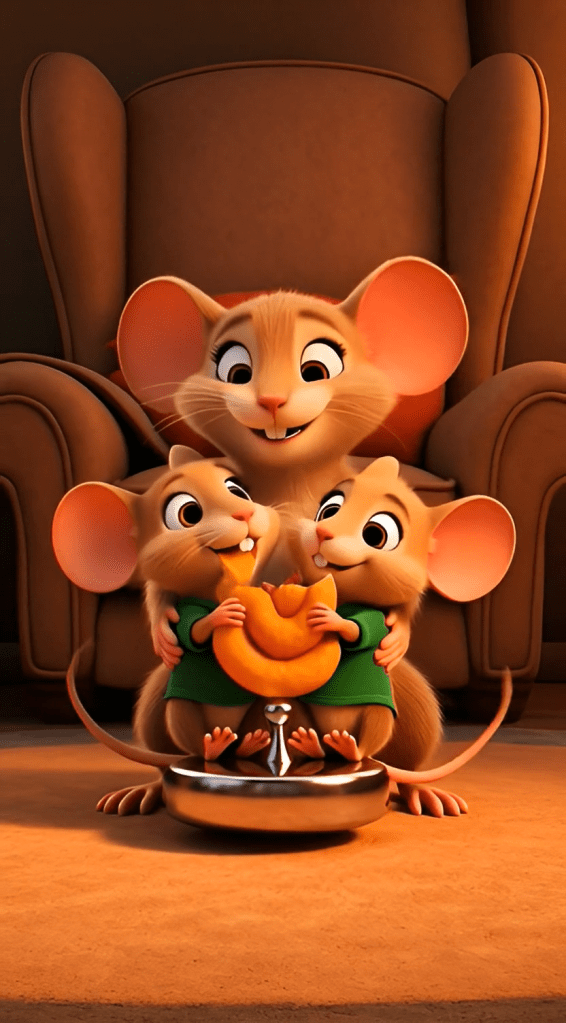
Character Action: Mama Mouse gasps with joy, sweeps Pip and Squeak into a giant hug, covering them in kisses. They all sit on the large, shiny button, sharing an enormous Cheeto, laughing.
Dialogue:

  • Mama Mouse: “My heroes! You found it!”
  • Pip: (Muffled from the hug) “We had help!”
  • Squeak: (Happily) “And we met new friends!”

3D to Video Prompt:
Warm sunset light fills the cozy nook behind an armchair. The two mouse children proudly roll a large, shiny button into the frame. Their mother mouse rushes in, sweeping them into a giant, furry hug. Final crane shot zooms out to show the happy mouse family sitting together on the button, sharing a giant Cheeto that is bigger than their heads. Heartwarming, cozy, celebratory mood. Soft textures and golden hour lighting.

Creating Horror on a Budget: The Last Light

By [Your Name] | Published [Date] | 12 min read


I never thought I’d be making horror films. But after two years of consuming every scary movie on streaming platforms and wondering “how hard could it be?”, I finally took the plunge. What started as a late-night idea became “The Last Light”—a six-minute horror short that’s genuinely terrifying (at least, my test audience said so while they gripped their armrests).

Here’s the thing: you don’t need film school or expensive equipment anymore. You need a compelling story, some creative problem-solving, and honestly? A lot of patience. Let me walk you through exactly how I did it.

Why I Chose This Story

The concept hit me during a particularly restless 3 AM session. What if cheap rent came with supernatural strings attached? We’ve all seen those listings that seem too good to be true—the beautiful apartment in a great neighborhood that’s somehow half the market rate. There’s always a catch.

I wanted to explore something deeper than jump scares, though. My protagonist Emma is a domestic violence survivor who’s financially broke and desperate for safety. When she finds apartment 7G for $600 a month (absurdly cheap for any city), she doesn’t ask questions. She can’t afford to.

That’s the hook that makes horror work—relatable desperation. We’ve all made questionable decisions when we’re desperate, right?

The building’s dark secret? It’s constructed on the ruins of an old morgue. And every night at exactly 9:47 PM, something remembers what used to be there. The rule is simple: keep your lights on. Always.

Breaking Down the Story Structure

Horror short films live or die in the first thirty seconds. You can’t waste time with slow builds when you’ve got six minutes total. Here’s how I structured “The Last Light”:

The Opening (90 seconds): I start with a narrator explaining the building’s history—the morgue, the bodies, the demolition, the apartments built on top. Then we meet Emma. Not when she’s already terrified, but when she’s hopeful. That contrast makes the horror hit harder.

The Setup (120 seconds): Emma moves in. Her neighbor Mr. Chen gives her a bizarre warning about keeping lights on at 9:47 PM. She laughs it off. We’ve all dismissed warnings we should’ve heeded.

The Escalation (90 seconds): She sees it happen—shadows that move wrong, things with too many limbs pressing under her door. But her light keeps them away. Night after night, she stays awake watching. The exhaustion builds.

The Break (60 seconds): She falls asleep at 9:45 PM. Wakes up at 9:48 in complete darkness. They’re in her room.

The Escape (45 seconds): Pure panic. Phone flashlight. Running. Shadows following. She reaches Mr. Chen’s apartment—a fortress of light.

The Twist (75 seconds): Mr. Chen has lived like this for seventeen years. Every tenant in the building does the same thing. We see them through windows—all awake, all surrounded by lights, all prisoners. Emma’s phone battery is at 23%. And it won’t last forever.

The ending isn’t about survival. It’s about realizing you’ve traded one prison for another, and this time there’s no escape.

The Technical Challenge: Making Horror Visual

Here’s where most beginner filmmakers struggle. How do you create genuinely scary visuals without a Hollywood budget?

I used AI image generation tools (Midjourney primarily, with some DALL-E for specific shots) to create each frame. Seventy-three individual shots total. But here’s the crucial part—consistency is everything.

Character Design Challenges

My biggest headache? Keeping Emma looking like the same person across all scenes. AI tools want to age characters when you prompt “exhausted” or “tired.” I learned this the hard way when my 28-year-old protagonist suddenly looked 50 in the fourth scene.

The fix: incredibly specific prompts. Instead of “exhausted woman,” I wrote “28-year-old woman with smooth youthful face showing acute sleep deprivation: dark circles under eyes, pale skin, messy hair, bloodshot eyes, but maintaining young facial structure with NO wrinkles or age lines.”

Every. Single. Time.

I also created a reference sheet with Emma’s exact features—hazel eyes, light olive skin, shoulder-length dark brown hair, specific face shape. I fed this into every prompt to maintain consistency.

Lighting as a Character

Since the whole story revolves around light versus darkness, I obsessed over lighting specifications. Each prompt included exact color temperatures in Kelvin:

  • Emma’s apartment safety: Warm 2700K (cozy but desperate)
  • Hallway fluorescents: Cool 4000K (institutional, unsafe)
  • Mr. Chen’s fortress: Overwhelming 2700K from dozens of sources (obsessive safety)
  • Darkness with shadows: Cool 8000K ambient with volumetric rendering

Sound pretentious? Maybe. But it created visual consistency that makes the film feel professionally shot rather than like a random collection of AI images.

Camera Angles That Tell the Story

I scripted specific camera movements for each shot:

  • Wide establishing shots for showing Emma’s isolation
  • Low angles looking up when the building or shadows loom threateningly
  • Extreme close-ups on Emma’s eyes to show her psychological state
  • High angles looking down to make her vulnerable during attacks
  • POV shots so the audience experiences her terror firsthand

The camera angle isn’t just technical—it’s emotional. When Emma first sees the shadows under her door, I used a ground-level extreme close-up. You’re right there with her, seeing something that shouldn’t exist.

Voice Acting: Finding the Right Sound

I wrote detailed voice specifications for each character because consistency matters as much in audio as visuals.

Emma’s voice evolves through six emotional stages:

  1. Confident Emma (moving in): 165 words per minute, pitch around 220 Hz, bright and optimistic
  2. Skeptical Emma (hearing warnings): Slower at 145 WPM, more controlled
  3. Frightened Emma (first encounter): Pitch jumps to 250 Hz, breathing becomes audible
  4. Exhausted Emma (sleep-deprived): Drops to 100 WPM, slurred, monotone
  5. Terror Emma (escaping): 200 WPM rapid panic, pitch spikes to 320 Hz with screaming
  6. Broken Emma (acceptance): 90 WPM, hollow, emotionally dead

I specified exact decibel levels, speaking pace, pitch ranges, and even pause lengths. Why? Because whether you use human voice actors or AI voice synthesis, you need these parameters to maintain character consistency.

Mr. Chen’s voice stays consistently weary—low pitch around 120 Hz, slow pace at 105 WPM, with elderly vocal characteristics like slight tremor and breathiness. He’s been exhausted for seventeen years. That doesn’t change.

The Sound Design Nobody Talks About

Here’s a secret: amateur horror films fail because their sound design sucks. You can have the scariest visuals, but if the audio feels off, the whole thing collapses.

I built layered soundscapes:

Background ambience (always present at -35 to -40 dB): City traffic for exterior shots, fluorescent hum for hallways, absolute silence in dark rooms (silence is terrifying).

The clock tick became a recurring motif. It starts barely audible at -36 dB during the intro, grows louder as tension builds, and continues throughout the film. It’s the sound of 9:47 approaching—over and over.

Shadow creature sounds aren’t traditional. I layered:

  • Wet breathing (pitched down 12 semitones)
  • Bone scraping on concrete (2000-4000 Hz range)
  • Reversed whispers (unintelligible, creepy)
  • When light hits them: high-pitched shrieks (3000-8000 Hz, actually painful)

The narration got special treatment too—medium hall reverb at 15% wet to create that documentary-style authority. The voice needed to sound like it’s revealing a terrible truth, not just reading a script.

Editing: Where Good Ideas Become Great Films

I used CapCut (free desktop version) for editing. DaVinci Resolve is more powerful if you want professional color grading, but CapCut’s interface is friendlier for beginners.

My workflow:

  1. Import all 73 images in order
  2. Set duration for each shot: Quick shots (2-3 seconds), emotional beats (6-8 seconds), important reveals (4-6 seconds)
  3. Add transitions: Mostly hard cuts (jarring, keeps tension), occasional fades for scene changes
  4. Layer in voice recordings: Match dialogue to specific shots
  5. Build the soundscape: Background ambience first, then effects, then music
  6. Color grade each scene: Historical morgue footage is desaturated with grain; Emma’s scenes transition from warm hope to cold fear; final scenes are harsh and overlit

The color grading matters more than you’d think. Emma’s apartment starts with warm, hopeful tones (3500K golden hour). By the end, it’s the same warm light, but now it feels oppressive—she’s trapped in forced brightness.

The Part Nobody Warns You About: Pacing

My first cut was eight minutes. Way too long. Horror shorts need to move.

I killed my darlings ruthlessly:

  • Cut an entire subplot about Emma researching the building (slowed everything down)
  • Removed a scene where she talks to another neighbor (redundant)
  • Trimmed every shot by 0.5-1 second (tightened the whole piece)

The final six-minute runtime feels fast but complete. Every shot earns its place.

What I Learned About Horror Storytelling

Fear needs context. The shadows aren’t scary because they’re monster designs. They’re scary because Emma just escaped an abusive relationship and desperately needs safety. The building’s trap is crueler because she specifically needed walls to protect her.

Rules create tension. “Never turn off your light at 9:47 PM” is simple and specific. The audience understands it immediately. We watch the clock with dread.

The scariest horror is inevitable. Emma can’t stay awake forever. We know she’ll fall asleep eventually. That countdown is more terrifying than any jump scare.

Endings should hurt. Emma doesn’t die. That would be mercy. She survives—trapped in a building where she has to stay awake watching her door every single night, probably for the rest of her life. That’s a horror that continues after the credits roll.

Budget Breakdown (Spoiler: Under $50)

Here’s what I actually spent:

  • Midjourney subscription: $10/month (cancelled after finishing)
  • ElevenLabs voice AI: $5 trial (one month)
  • Stock sound effects: $15 (SFX library)
  • CapCut: Free
  • My time: About 40 hours over two weeks

Total out-of-pocket: $30

Could you do it cheaper? Absolutely. Free AI tools exist (though with limitations). You could record your own voice. You could use copyright-free sound effects from Freesound.org.

Could you spend more? Also yes. Professional voice actors, custom music composition, 4K rendering—the ceiling is high. But you don’t need it for YouTube or festival submissions.

Publishing Strategy: Actually Getting Views

Making the film is half the battle. Getting people to watch it is the other half.

YouTube optimization:

  • Title: “THE LAST LIGHT | Never Turn Off Your Light at 9:47 PM | Horror Short Film” (includes hook and keywords)
  • Thumbnail: Bold text “9:47 PM” with Emma’s terrified face (readable on mobile)
  • Description: Full synopsis with content warnings, credits, and a question for engagement
  • Tags: Horror short film, scary stories, supernatural horror, indie horror, psychological thriller
  • Hashtags: #HorrorShortFilm #TheLastLight #ScaryStories

Cross-platform promotion:

  • Cut 3-5 teaser clips (60 seconds each) for TikTok and Instagram Reels
  • Post behind-the-scenes content showing the creation process
  • Share to Reddit communities (r/horror, r/ShortFilm, r/IndieFilm)
  • Create Pinterest pins with compelling text overlays

Engagement tactics:

  • Pinned comment: “Would you stay in this apartment for $600/month? Or risk being homeless?”
  • Reply to every comment in the first 48 hours
  • Post to relevant horror communities and forums

The algorithm rewards watch time and engagement. A six-minute horror short that people actually finish performs better than a twenty-minute film where viewers drop off.

What Worked (And What I’d Change)

What worked:

  • The emotional hook (domestic violence survivor seeking safety)
  • The simple, clear rule (lights on at 9:47 PM)
  • Building tension through exhaustion rather than just scares
  • The tragic ending (no escape, permanent imprisonment)
  • Character consistency across all shots (after I figured it out)

What I’d change:

  • Add more variety in shot composition—some scenes felt visually repetitive
  • Spend more time on sound mixing—a few transitions were jarring
  • Create a proper making-of documentary—people love behind-the-scenes content
  • Test with more audiences before finalizing—I showed it to five people; should’ve been fifteen

Advice for Your First Horror Short

Start with concept, not effects. Don’t build your story around a cool visual you want to create. Build it around an emotion you want to evoke. What keeps you up at night? What makes you uncomfortable? That’s your starting point.

Shorter is better. Aim for 3-6 minutes max. Attention spans are short. Prove you can tell a complete story efficiently before attempting longer formats.

Sound matters more than visuals. Seriously. Watch your film with eyes closed. If it’s not scary just from audio, fix the sound design.

Write detailed prompts. Whether you’re using AI tools or directing human actors/artists, specificity prevents endless revisions. “Scary woman in dark room” gets you garbage. “28-year-old woman, hazel eyes wide with terror, pale skin, lit only by phone screen glow from below, shadows behind her” gets you something usable.

Study what scares you. Before I wrote a word, I watched fifty horror shorts. I noted what worked: pacing, reveals, sound cues, camera angles. Steal techniques (not stories).

Embrace limitations. No budget means you can’t do elaborate chase scenes or complex locations. Good. Constraints force creativity. “The Last Light” happens almost entirely in one apartment. That limitation made me focus on psychological horror rather than spectacle.

Test early and often. Show rough cuts to people who’ll be honest. If they’re checking their phones during the “scary” parts, those parts aren’t working.

The Unexpected Benefits

Beyond creating something I’m genuinely proud of, this project taught me skills I didn’t expect:

  • Prompt engineering (useful for any AI tool, not just image generation)
  • Audio engineering basics (now I notice sound design in every film I watch)
  • Story structure (applicable to any writing)
  • Project management (keeping track of 73 shots, multiple audio layers, revisions)
  • Marketing fundamentals (SEO, thumbnails, hook-driven titles)

Plus, having a completed film opens doors. I’ve already been invited to submit to two indie horror film festivals. Whether it gets accepted isn’t the point—I actually finished something.

What’s Next

I’m already outlining my next short. Same process, different story. This one’s about a video call that won’t end, even after you hang up. Working title: “Still Connected.”

The skills compound. This second film will take half the time because I’m not learning the tools anymore. By the fifth or sixth, I might actually be good at this.

Resources That Actually Helped

For learning:

  • YouTube channels: Film Riot, Indy Mogul, StudioBinder
  • “Save the Cat! Writes a Novel” by Jessica Brody (story structure)
  • Reddit: r/Filmmakers, r/horror, r/indiefilmmaking

For creation:

  • Midjourney (AI image generation)
  • CapCut or DaVinci Resolve (editing)
  • ElevenLabs (AI voice synthesis)
  • Freesound.org (sound effects)
  • Epidemic Sound or Artlist (royalty-free music)

For distribution:

  • YouTube (primary platform)
  • Film Freeway (festival submissions)
  • TikTok/Instagram (short-form promo)
  • Reddit communities (targeted sharing)

Final Thoughts

“The Last Light” isn’t perfect. There are things I’d fix if I could start over (that awkward transition at 3:42, for instance). But perfect isn’t the goal when you’re learning. Done is the goal.

A year ago, I was just another person who thought “I could probably make a horror film.” Now I’ve actually done it. That shift from consumer to creator changes how you see everything.

The tools have never been more accessible. The barriers have never been lower. You don’t need permission, funding, or connections. You need a story worth telling and the discipline to finish it.

So here’s my question: What’s your horror story? What keeps you up at 3 AM? What would make someone grip their armrest?

Figure that out, and you’re already halfway there.


“The Last Light” is available to watch on YouTube. If you create your own horror short using this guide, I’d genuinely love to see it—tag me or drop a link in the comments below.


About the Author: [Your Name] is an independent filmmaker and content creator specializing in horror short films. After creating “The Last Light” with zero budget and no film school training, they’re documenting the entire process to help other aspiring creators bring their stories to life. Follow their journey on [social media links].


Comments Section (Engagement)

What would YOU do if you found an apartment with a rule like this? Would you stay for cheap rent, or would you run?

Drop your horror short film ideas below—I’m curious what stories are keeping other creators up at night.